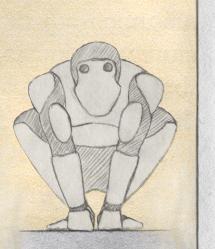


 Technology and workflow
Technical goals
From the technical perspective, our goals is to use many modern computer graphics techniques:
- Normal mapping enables us to display rich visual detail in realtime; such details wouldn't be possible with polygons only.
- Precalculated ambient occlusion for soft lighting.
- Realtime generated soft shadows for the characters.
- Realtime generated blurry reflections to simulate the look of bright plastic room.
- Depth of field as a full-screen postprocessing effect.
- Special effects for "electricity" inside the mechanical character and "magic" wall destruction effects.
- Realtime wall fracture and physics.
* The platform specifications for Imagine Cup 2005 Rendering Invitational aren't defined yet (30 Mar 2005), so we made 'reasonable' estimates ourselves and hope for the best.
Demo creation process
Our content creation process consists of the following steps:
- Concept art: sketches (Paulius) and discussions (everyone).
- Authoring models:
- High-detail models (Paulius: most of the scenery; Antanas: characters, some of the scenery). Discussions and possible tweaks to the models.
- Low-detail models for actual use in the demo (Paulius and Aras). Some authored by hand from high-detail models, some generated using standard polygon reduction techniques and tweaked afterwards.
- Texture coordinates (UV mapping) for the low-detail models (Aras).
- Authoring textures:
- Compute normal maps and ambient occlusion maps using high-detail models (Aras).
- Generate base seamless textures for some models using custom tool (Paulius, Aras).
- Make textures for other models and tweak some of generated textures (Paulius)
- Authoring animations:
- Animate the characters (mostly main character) through the whole story (Antanas). Lots of discussions, tweakings and even acting here :)
- Make short separate animation loops for the interactive mode (Antanas).
- Position, animate and time cameras (Antanas).
- Programming:
- Base engine and tools (Aras).
- Base demo infrastucture and rendering effects (shaders etc.) (Aras).
- Special effects (electricity, attacks) (Paulius, Aras).
- Wall fracture and physics (Aras).
- Interactive mode (animation selection and blending, user controls etc.) (Aras).
- Performance tuning and compatability testing (Aras).
- Author music and sound effects (Raimundas).
- Actually finishing the whole thing (i.e. final crunchtime) (everyone) :)
This workflow is pretty similar to the way modern games or machinima movies are made. The steps don't strictly follow the listed order; most of them are performed in iterative way (for example, the model may require some tweaking after the animation is made). Some steps may be performed concurrently by different persons (e.g. texturing and animation are mostly independent, once the models are made).
Normal mapping
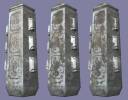
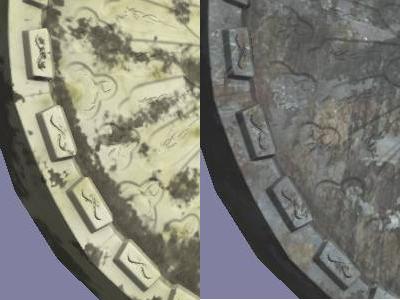
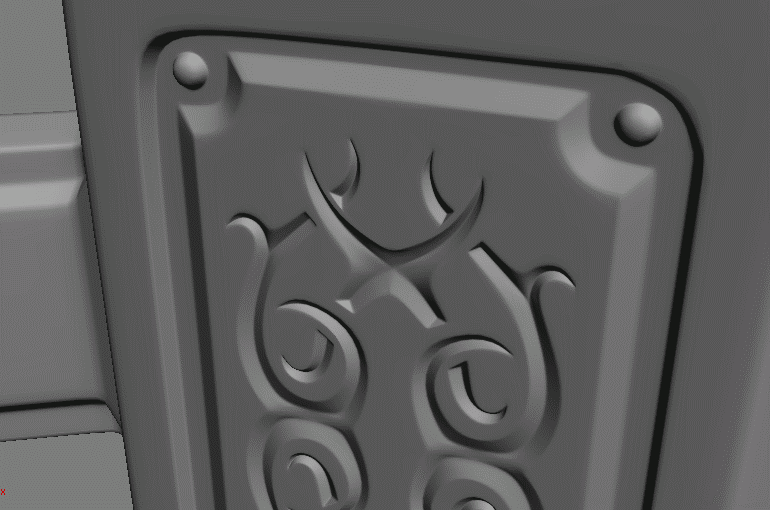 Our goal was lots of detail on the architecture of the outer walls - example on the left shows detail in 25 x 25 centimeters region. The main room is roughly 8 x 10
meters in size and 4 meters in height, and with such amount of detail we'd reach 20-30 million polygons only for the outer walls! Therefore we decided to use fairly
low-polygon models in the demo, and use normal maps to simulate surface details.
Our goal was lots of detail on the architecture of the outer walls - example on the left shows detail in 25 x 25 centimeters region. The main room is roughly 8 x 10
meters in size and 4 meters in height, and with such amount of detail we'd reach 20-30 million polygons only for the outer walls! Therefore we decided to use fairly
low-polygon models in the demo, and use normal maps to simulate surface details.
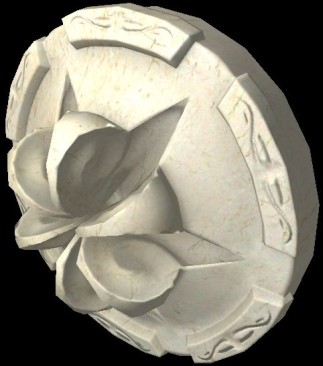
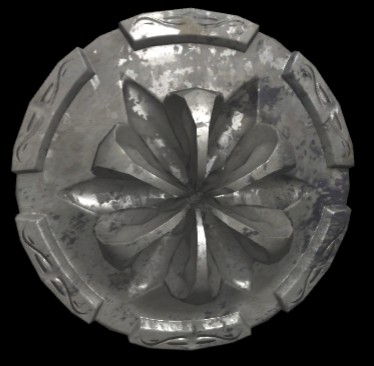
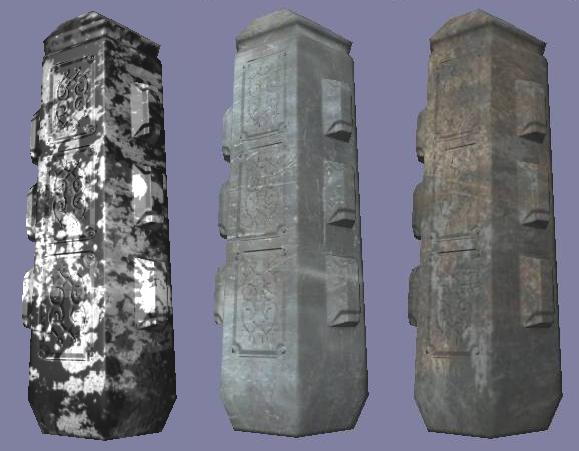
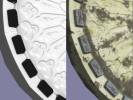
A normal map is a regular rexture, but instead of storing colors, it stores surface orientations. Each pixel in the texture is interpreted like a 3D vector that is used in lighting
calculations. Below is one piece of the outer walls: the low-polygon version that is used for rendering (240 triangles), the normal map,
the ambient occlusion map (see below) and finally how it it looks with normal and ambient occlusion maps, rendered in realtime (without texture
and with texture). The high-polygon version (56000 triangles) is not used for realtime rendering at all, just for normal map computation.


Ambient occlusion
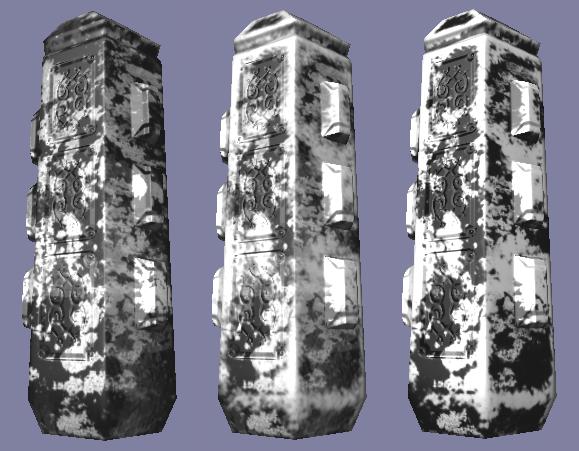
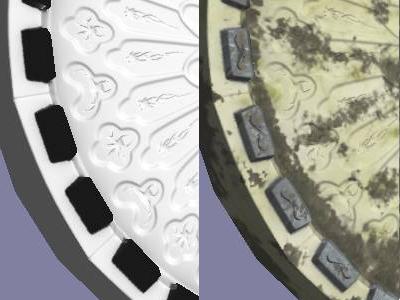
Another goal was soft "natural" lighting on the scenery: for example, some areas of the surface aren't exposed to light and hence should be darker. Ambient occlusion enables us to have exactly this: for each point on the surface, we calculate how much of it is "open" (i.e. not occluded by some nearby surface). In the end, for each distinct object in the scene we have a special "ambient occlusion" texture that we use at rendering time in the lighting calculations.
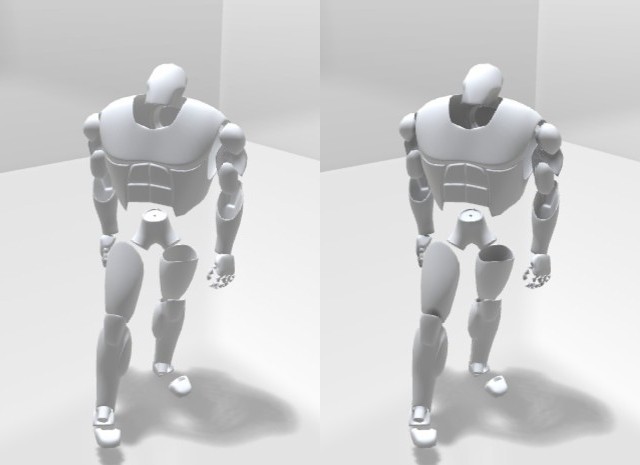
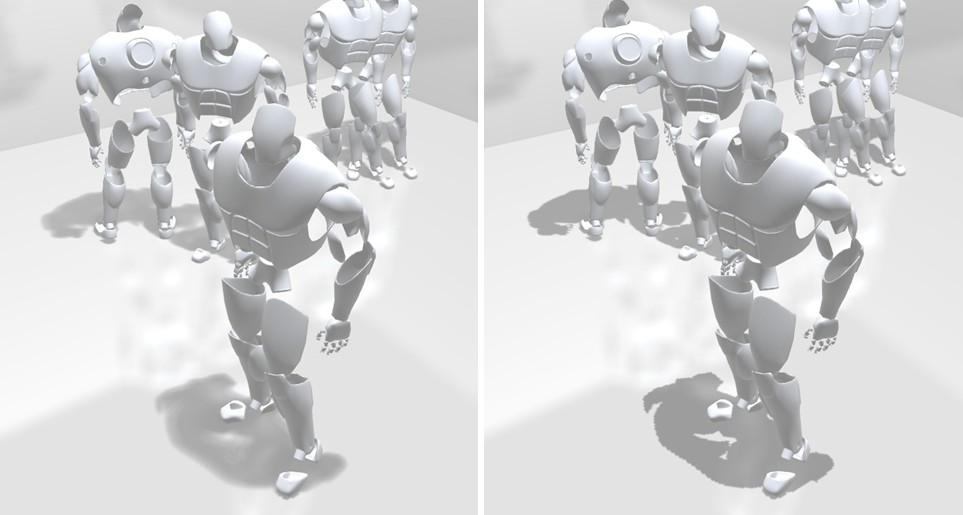
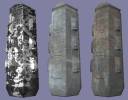
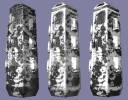
 Example on the left is our main character without ambient occlusion (left part) and with ambient occlusion (right part) applied. On the right there's example piece
from the outer walls, rendered with normal and ambient occlusion maps.
Example on the left is our main character without ambient occlusion (left part) and with ambient occlusion (right part) applied. On the right there's example piece
from the outer walls, rendered with normal and ambient occlusion maps.
Soft shadows
 For character shadows, we developed a custom algorithm that can generate shadow penubra regions very efficiently, when projected shadows are cast on nearly planar surfaces.
A paper that describes our algorithm is already accepted to upcoming ShaderX4 book.
For character shadows, we developed a custom algorithm that can generate shadow penubra regions very efficiently, when projected shadows are cast on nearly planar surfaces.
A paper that describes our algorithm is already accepted to upcoming ShaderX4 book.
On the right side there's an example of our soft shadows algorithm (left part) versus standard projected shadows algorithm (right part). The soft penumbra regions make the shadow look much more realistic.
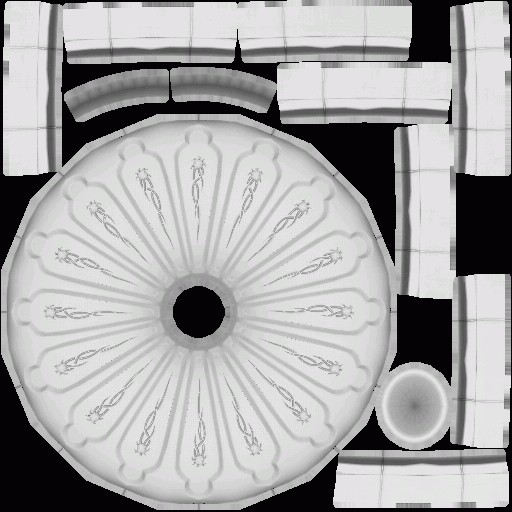
Seamless textures
We have many complex models in the outer walls, and at first we thought it would be a problem to nicely texture all of them. The main difficulty is that most of the models are highly curved (i.e. not flat), and laying down the flat texture onto a 3D model in such a way that no "seams" would be visible is very hard.
Most of the time the models had to be textured with stone or stone-like textures. We thought about writing procedural "stone shaders", but rejected that idea - writing a program that would generate realistic and interesting 3D stone texture is very hard.
 In one eureka! moment we found nice and easy way to seamlessly apply regular stone textures to the 3D models. We already had authored unique surface-to-plane UV
mappings (for normal and ambient occlusion maps) for all our models, so our idea was this: project tileable stone textures onto the model's surface from several angles; and weight
the results according to the orientation of the surface (surface's normal).
In one eureka! moment we found nice and easy way to seamlessly apply regular stone textures to the 3D models. We already had authored unique surface-to-plane UV
mappings (for normal and ambient occlusion maps) for all our models, so our idea was this: project tileable stone textures onto the model's surface from several angles; and weight
the results according to the orientation of the surface (surface's normal).
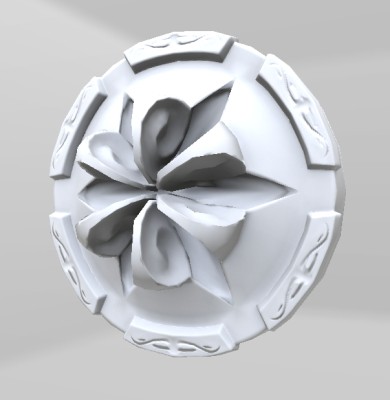
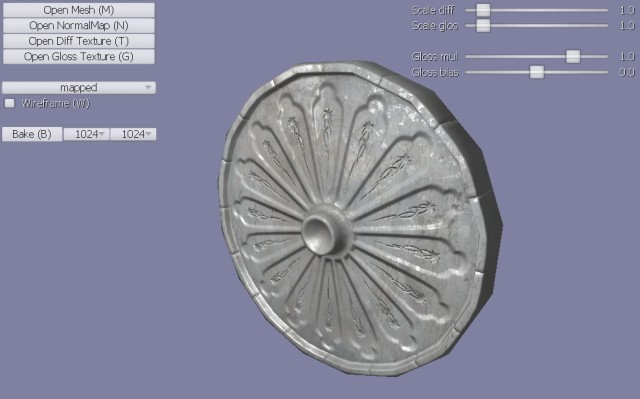
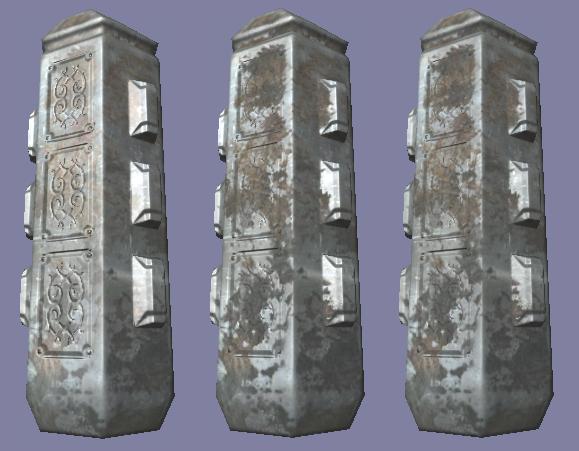
We wrote a tool to do that (screenshot on the right), and the results turned out to be very good - given an example texture, we only need to set several parameters and the tool generates the texture for any model in several seconds. The tool can also generate "gloss" textures (where brightness indicates how much surface is "shiny" at this point) in a similar way.
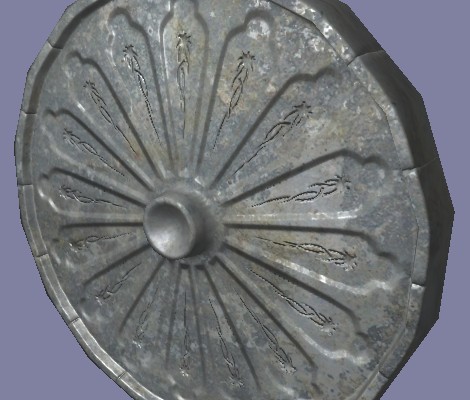
 On the left side there's example model with one generated texture (without gloss); on the right there's another
generated texture (with gloss - note the shiny spots).
On the left side there's example model with one generated texture (without gloss); on the right there's another
generated texture (with gloss - note the shiny spots).
The generated textures can be tweaked in bitmap editor like regular textures if desired, but the tool that generates a nice and seamless "base version" saved lots of time.
Texturing
Texturing of each object was done in the following steps:
-
 Generate three textures using tool described in previous section:
initial dirt/clean mask, clean texture and dirty texture. Example on the right:
dirt mask, clean metal and dirty metal textures.
Generate three textures using tool described in previous section:
initial dirt/clean mask, clean texture and dirty texture. Example on the right:
dirt mask, clean metal and dirty metal textures.
Some of the objects are made from two materials (e.g. rock and with small parts of metal), so we to generate two more textures: clean and dirty textures for the second material. - Import initial mask into 3D painting program. Paint white color on the corners of the metal objects (i.e. make the corners "more clean") or use different logic for marble and rock objects. Export the edited mask.
-
 Load the mask into image editor. Strongly increase the contrast - this produces hard edges
between clear and dirty parts of the object. Example on the right: all three steps (initial, painted and
with increased contrast) of dirt/clean mask.
Load the mask into image editor. Strongly increase the contrast - this produces hard edges
between clear and dirty parts of the object. Example on the right: all three steps (initial, painted and
with increased contrast) of dirt/clean mask.
- Load clean and dirty textures into image editor; use mask from previous step to blend between these two textures. White areas represent clean texture and black areas - the dirty parts.
-
 Use this mask as gloss (specular strength) texture too. Combine specular texture into alpha channel
of object texture. Decrease brightness of the gloss texture in order to have less
shiny objects (for metal object we decrease it slightly, for marble much stronger, and for rock
objects gloss is almost zero). Example on the right: left is object without
gloss texture (i.e. specular is max), center is object with gloss channel
and right one is gloss with decreased brightness. The rightmost one is the final.
Use this mask as gloss (specular strength) texture too. Combine specular texture into alpha channel
of object texture. Decrease brightness of the gloss texture in order to have less
shiny objects (for metal object we decrease it slightly, for marble much stronger, and for rock
objects gloss is almost zero). Example on the right: left is object without
gloss texture (i.e. specular is max), center is object with gloss channel
and right one is gloss with decreased brightness. The rightmost one is the final.
-
 Generate texture of the second material with dirt and clean parts and gloss channel as
described previously. Image on the right: the same object with two differt materials.
Generate texture of the second material with dirt and clean parts and gloss channel as
described previously. Image on the right: the same object with two differt materials.
- Paint blend mask of the materials. Make it from normal maps (detect edges, then select regions of same color and cleanup by hand) or from textures with "baked" wireframe of the object.
-
 Combine materials using the mask. Example on the right: material blend mask and the final texture.
Wall fracture and physics
Accoring to scenario, the walls fracture when hit by "the powers" of the character, and the pieces realistically fall on the floor, some bounce a bit and come to rest. Additionally, in interactive part of the demo the user can hit any wall anywhere, and it realistically fractures and the pieces fall out. This rules out any precalculated animation for the fracture & physics - both of them must actually be calculated and performed in realtime.
For fracture calculation we use algorithmically generated "fracture patterns" that are further organized into a hierarchy of patterns that can support both small and large fracture details. Hierarchical organization also helps with simulation speed, as we can efficiently fracture out only some region of the whole wall. Because our walls are flat, the fracture is essentially two dimensional simulation and can be calculated very fast.
Once the fractured out pieces of the wall are determined, we apply initial forces to them according to the blast curve model that's widely used in structural engineering research.
The motion of falling pieces is simulated using standard rigid body dynamics methods. We don't try to invent the bicycle here and will use some of the freely available rigid body dynamics and collision detection libraries. Currently in evaluation are ODE (completely free, source code available, and we have some experience with it), NovodeX (very fast, free for non commercial use) and Newton Game Dynamics (free, but doesn't come with source code). Note: we ended up using slightly modified ODE physics library.

